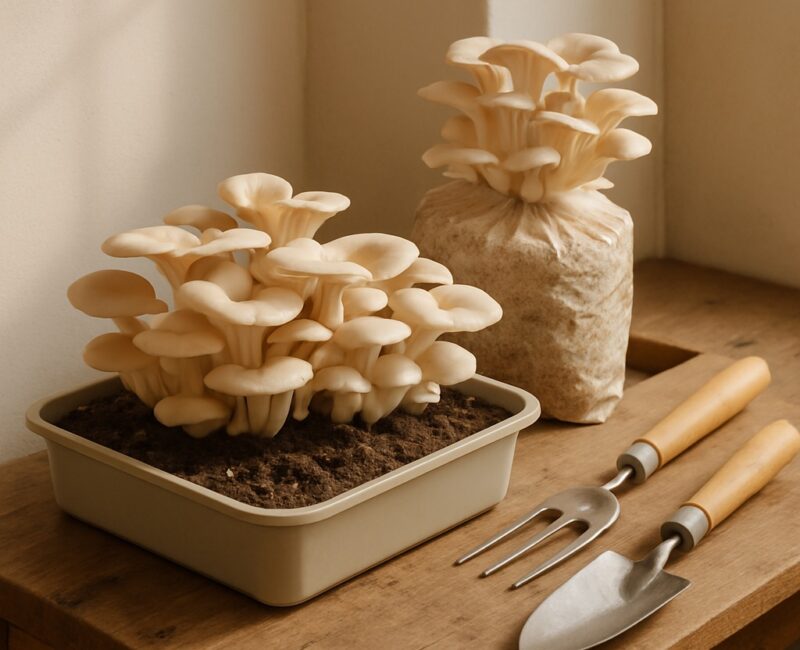
If you’ve been wondering how to grow mushrooms at home, you’re joining thousands of gardening enthusiasts who’ve discovered that mushroom cultivation is one of the most rewarding indoor gardening projects you can undertake. Unlike traditional gardening, learning how to grow mushrooms at home doesn’t require a sprawling backyard, abundant sunshine, or even green thumbs—just a small dark corner, basic supplies, and a bit of patience.
After two decades of cultivating everything from heirloom tomatoes to exotic orchids, I can confidently say that growing mushrooms has been one of my most satisfying gardening adventures. There’s something almost mystical about watching fungi emerge from seemingly nothing, transforming agricultural waste into nutrient-dense food within weeks. Whether you’re motivated by sustainability, curiosity, or simply the desire for fresh, organic produce, this comprehensive guide will walk you through every step of the mushroom-growing journey.
Why Every Home Gardener Should Try Growing Mushrooms
Before we dive into the technical details, let’s explore why mushroom cultivation has exploded in popularity among home gardeners in 2025.
Nutritional Powerhouse Mushrooms are extraordinary nutritional allies. They’re packed with protein, fiber, B vitamins (including B2, B3, and B5), and are one of the few plant-based sources of vitamin D. Many varieties contain powerful antioxidants and compounds that support immune function. When you grow mushrooms at home, you’re cultivating fresh, chemical-free superfoods right in your own space.
Space-Efficient Gardening Live in a cramped apartment? No problem. Mushrooms thrive in compact, vertical spaces that would be useless for conventional gardening. A single shelf in your basement, a corner of your kitchen cabinet, or even under your bathroom sink can become a productive mushroom farm. I’ve seen impressive yields from grow spaces no larger than a shoebox.
Read more – 10 Health Benefits of Mushrooms: A Nutrient Packed Superfood
Rapid Harvest Cycles Unlike tomatoes that take months or fruit trees that take years, many mushroom varieties go from inoculation to harvest in just 2-4 weeks. This quick turnaround makes mushroom growing incredibly gratifying for beginners who want to see results fast.
Environmental Champion Mushrooms are nature’s recyclers. They transform agricultural waste—coffee grounds, straw, sawdust, cardboard—into nutritious food. Growing mushrooms at home reduces food waste, cuts down on grocery packaging, and minimizes your carbon footprint. It’s circular economy gardening at its finest.
Therapeutic Benefits There’s something deeply meditative about mushroom cultivation. The daily misting ritual, the careful observation of mycelial growth, the anticipation of pinning—it’s a mindful practice that reduces stress and connects you with natural cycles in ways that smartphone-addicted modern life rarely allows.
Best Mushroom Varieties for Home Cultivation
Not all mushrooms are created equal when it comes to home growing. After experimenting with dozens of varieties, here are my top recommendations for beginners:
1. Oyster Mushrooms
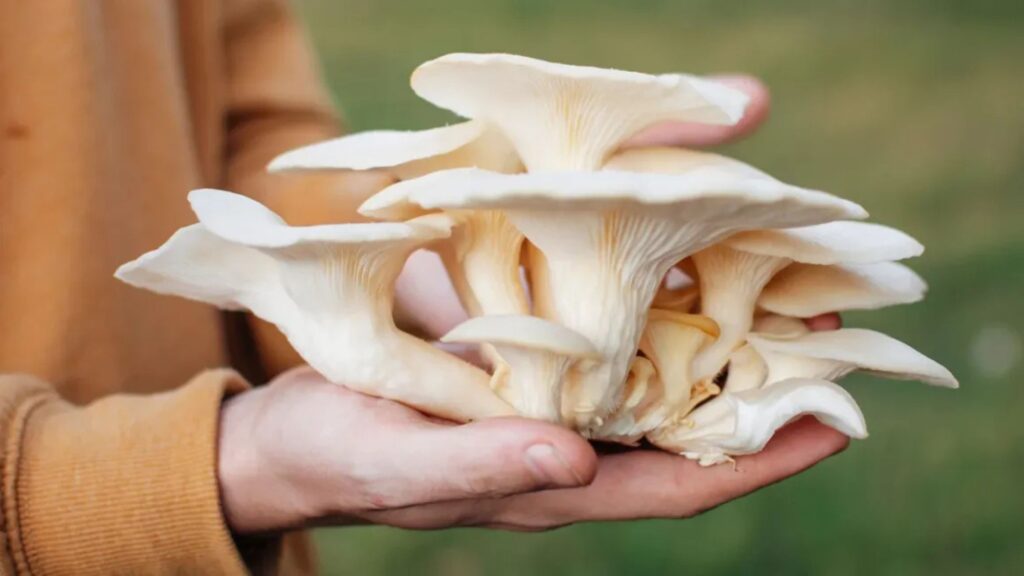
The Gateway Mushroom If you’re learning how to grow mushrooms at home for the first time, start here. Oyster mushrooms are incredibly forgiving, grow blazingly fast, and produce impressive yields. They’re also delicious—mild, slightly sweet, with a tender texture that works beautifully in stir-fries, soups, and sautés.
Growing Profile:
- Substrate: Coffee grounds, straw, cardboard, hardwood sawdust
- Temperature: 55-75°F (13-24°C)
- Harvest time: 7-14 days after pinning
- Difficulty: Beginner-friendly
I’ve successfully grown oyster mushrooms on everything from shredded office paper to spent coffee grounds collected from local cafés. They’re remarkably adaptable and contamination-resistant.
2. Button Mushrooms
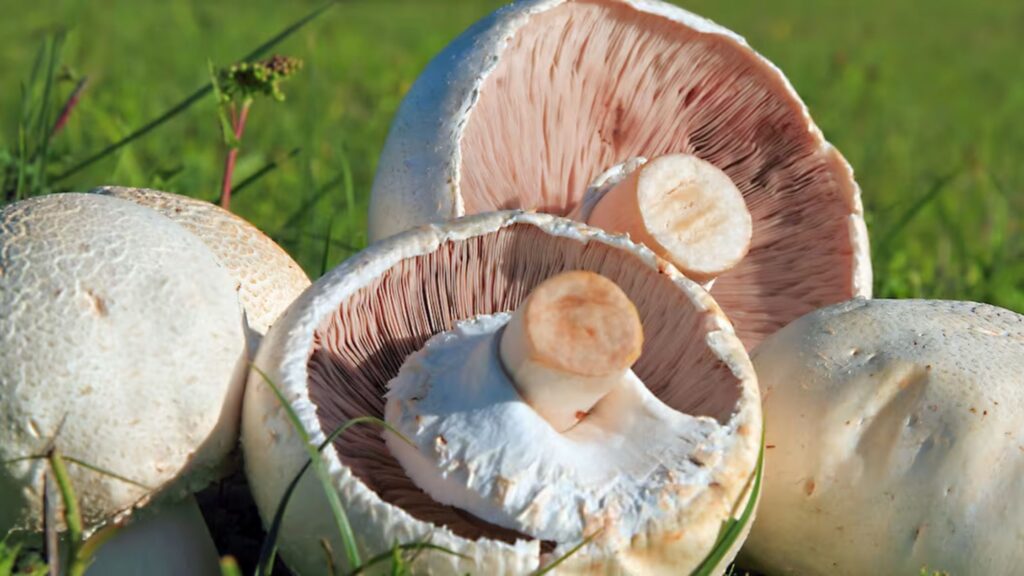
The Familiar Favorite These are the white mushrooms you see in every grocery store. While slightly more demanding than oysters, button mushrooms are still very manageable for beginners and offer that classic mushroom flavor everyone knows and loves.
Growing Profile:
- Substrate: Composted manure, straw compost
- Temperature: 55-65°F (13-18°C)
- Harvest time: 14-21 days after casing
- Difficulty: Beginner to intermediate
3. Shiitake Mushrooms
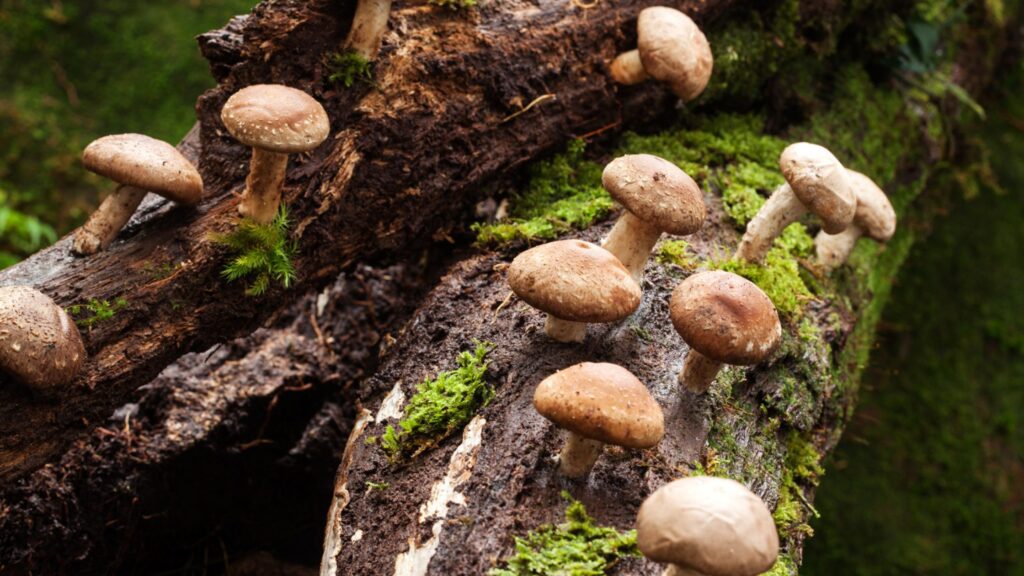
The Gourmet Choice Shiitakes command premium prices at farmers’ markets for good reason—their rich, umami flavor is unmatched. They require more patience than oysters but are absolutely worth the wait.
Growing Profile:
- Substrate: Hardwood logs or supplemented sawdust blocks
- Temperature: 55-75°F (13-24°C)
- Harvest time: 7-14 days after shocking (for fruiting)
- Difficulty: Intermediate
4. Lion’s Mane
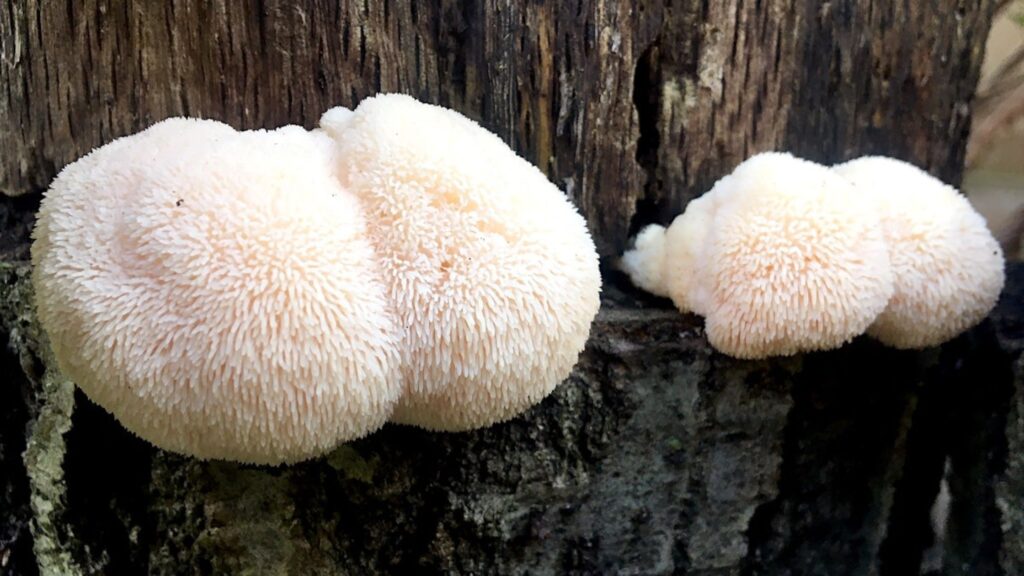
The Brain Booster This spectacular mushroom looks like a white waterfall and tastes remarkably like crab or lobster. It’s also gaining attention for potential cognitive benefits, making it popular among biohackers and health enthusiasts.
Growing Profile:
- Substrate: Hardwood sawdust, supplemented blocks
- Temperature: 65-75°F (18-24°C)
- Harvest time: 10-14 days after pinning
- Difficulty: Intermediate
Essential Supplies for Growing Mushrooms at Home
One of the beauties of mushroom cultivation is that you don’t need expensive equipment. Here’s what you’ll actually use:
Core Supplies:
- Mushroom spawn (your “seeds”—buy from reputable suppliers)
- Growing substrate (straw, sawdust, manure, or coffee grounds)
- Containers (plastic bins, grow bags, or food-grade buckets)
- Spray bottle for maintaining humidity
- Clean growing space (basement corner, closet, or cabinet)
Optional But Helpful:
- Digital thermometer and hygrometer
- Pressure cooker for sterilization (if going advanced)
- Humidity tent or greenhouse setup
- LED grow lights (minimal light needed)
- pH testing strips
You can start with a basic kit for under $30, or invest in quality spawn and materials for $50-75 for a serious setup.
Step-by-Step: How to Grow Mushrooms at Home
Now let’s get into the practical process. I’ll walk you through the standard method that works for most beginner-friendly varieties.
Step 1: Select Your Mushroom Variety and Obtain Quality Spawn
Your success begins with choosing the right mushroom for your environment and obtaining high-quality spawn. Spawn is mushroom mycelium grown on a carrier material—essentially the “seed” of your mushroom garden.
Where to Source Spawn: Purchase from established suppliers specializing in mushroom cultivation. Look for spawn that’s fresh, with visible white mycelium and a pleasant, earthy smell. Avoid spawn with green, black, or pink discoloration—signs of contamination.
Step 2: Prepare Your Growing Substrate
The substrate is your mushroom’s food source. Different mushrooms prefer different substrates, but the preparation principle remains similar: you must eliminate competing organisms while preserving beneficial nutrients.
For Straw (Oyster Mushrooms):
- Chop straw into 2-4 inch pieces
- Submerge in water heated to 160-180°F (71-82°C) for 60-90 minutes
- Drain and cool to room temperature
- Squeeze out excess water—substrate should be moist but not dripping
For Coffee Grounds (Oyster Mushrooms): Collect fresh used grounds (within 24 hours). They’re already pasteurized from brewing and ready to use immediately—one of the easiest substrates for absolute beginners.
Read more – 10 Health Benefits of Mushrooms: A Nutrient Packed Superfood
For Composted Manure (Button Mushrooms): Use pre-composted horse manure mixed with straw, or purchase prepared mushroom compost. This substrate requires the most preparation but produces excellent results.
Step 3: Inoculation—Introducing Spawn to Substrate
This is where the magic begins. Cleanliness is crucial during inoculation to prevent contamination.
Process:
- Sanitize your work surface, containers, and hands thoroughly
- Mix spawn with prepared substrate at roughly 10-20% spawn by weight
- Pack the mixture into your growing container
- For grow bags: fill and fold the top loosely
- For bins: pack evenly and cover with a loose lid
Pro Tip: Work quickly but carefully. The longer your substrate is exposed to open air, the higher the contamination risk. I like to have everything staged and ready before opening my spawn bag.
Step 4: Incubation—The Colonization Phase
During incubation, mushroom mycelium spreads throughout the substrate, preparing for fruiting. This phase requires:
Conditions:
- Temperature: 68-75°F (20-24°C) for most varieties
- Light: Complete darkness or minimal light
- Air exchange: Minimal (sealed or loosely covered)
- Duration: 7-21 days depending on variety
What to Look For: Within 3-5 days, you should see white, thread-like mycelium spreading from the spawn. This should eventually cover the entire substrate in a dense white mat. The substrate may generate heat—this is normal and indicates healthy colonization.
Warning Signs:
- Green, black, or pink growth = contamination (discard immediately)
- Foul smell = bacterial contamination
- No growth after 7 days = temperature too low, old spawn, or contamination
Step 5: Fruiting—Triggering Mushroom Formation
Once your substrate is fully colonized (completely white), it’s time to initiate fruiting—the phase where actual mushrooms develop.
Environmental Shift:
- Temperature: Drop by 5-10°F from incubation temps
- Light: Indirect natural or LED light 12 hours daily
- Humidity: 80-95% (frequent misting)
- Fresh air exchange: Increased FAE (5-6 times daily)
Technique:
- Move containers to fruiting location
- For grow bags: cut X-shaped slits for mushrooms to emerge
- For bins: remove or crack the lid
- Mist surfaces 2-4 times daily without soaking
- Fan for 30 seconds after each misting
Pinning: Within 3-7 days, you’ll see tiny mushroom “pins” forming. This is one of the most exciting moments in mushroom cultivation—watching baby mushrooms emerge from seemingly nothing.
Step 6: Harvest and Beyond
When to Harvest:
- Oyster mushrooms: Just before or as the cap edges begin to flatten
- Button mushrooms: When caps are still rounded and closed
- Shiitake: When caps are 70-80% open but before they fully flatten
- Lion’s Mane: When the “teeth” are 1/4 to 1/2 inch long
Harvesting Technique: Grasp the mushroom cluster at the base and twist gently while pulling. Clean cuts with a sharp knife work too. Never yank straight up—you’ll damage the mycelium.
Second Flush: After harvesting, your substrate often produces additional flushes. Continue misting and maintaining fruiting conditions. You can typically harvest 2-4 flushes before the substrate is spent, with yields decreasing each time.
Pro Tips from Two Decades of Growing Experience
1. Cleanliness Is Everything Contamination is your biggest enemy. I always work near a flame (like a candle or alcohol lamp), sanitize with isopropyl alcohol, and never touch spawn with bare hands that haven’t just been washed.
2. Master Humidity Without Overwatering High humidity is crucial, but water pooling on mushrooms causes rot. Mist the air around mushrooms and container walls—not directly on the mushrooms themselves.
3. Temperature Consistency Matters Wild temperature swings stress mycelium. I use a basement corner where temperatures naturally stay stable year-round. If your space fluctuates, consider a small space heater or cooling setup.
4. Start a Growing Journal Document everything: spawn source, substrate type, inoculation date, pinning date, harvest weight, observations. This data becomes invaluable for troubleshooting and improving your technique.
5. Join the Community Online mushroom growing forums and local mycology clubs are goldmines of practical wisdom. I’ve learned more from experienced cultivators’ mistakes and successes than from any book.
Common Mistakes and How to Avoid Them
Mistake #1: Using Contaminated Substrate Solution: Always properly pasteurize or sterilize your growing medium. Don’t skip this step to save time—you’ll lose more time dealing with contamination.
Mistake #2: Insufficient Humidity Solution: If mushrooms are cracking, drying out, or growing slowly, increase humidity. Use a humidity tent, more frequent misting, or a small humidifier.
Mistake #3: Poor Air Exchange Solution: Mushrooms need oxygen. If you see long, skinny stems with tiny caps, increase fresh air exchange by fanning more often or enlarging bag openings.
Mistake #4: Harvesting at the Wrong Time Solution: Learn the signs for your specific variety. Oysters harvested too late become tough; buttons harvested too early have less flavor. Timing comes with experience.
Mistake #5: Giving Up After First Failure Solution: Contamination happens to everyone, even experts. Learn what went wrong, adjust, and try again. My first three attempts failed spectacularly, but attempt four was glorious.
Creative Ways to Use Your Homegrown Mushrooms
Once you’re harvesting regularly, you’ll have more mushrooms than you might expect. Here’s how I use my abundant yields:
- Immediate consumption: Sauté in butter with garlic and thyme, add to omelets, toss into pasta
- Dehydrating: Dried mushrooms last months and reconstitute beautifully for soups and sauces
- Powder: Grind dried mushrooms into powder for umami seasoning
- Freezing: Sauté first, then freeze in portions for later use
- Sharing: Neighbors and friends love receiving fresh, gourmet mushrooms
- Value-added products: Mushroom jerky, pickled mushrooms, mushroom pâté
The Future of Home Mushroom Cultivation
The mushroom growing movement is exploding. In 2025, we’re seeing:
- Sophisticated grow kits that automate humidity and temperature
- Urban mushroom farms supplying restaurants directly
- Medicinal mushroom interest driving lion’s mane and reishi cultivation
- Sustainability focus making mushroom growing part of zero-waste lifestyles
- Community growing with neighborhood mushroom clubs sharing resources
This isn’t just a hobby—it’s becoming a meaningful component of food security and sustainable living for thousands of households.
Your Mushroom Growing Journey Begins Now
Learning how to grow mushrooms at home is one of those rare skills that’s both easier than you expect and more rewarding than you imagine. Unlike the unpredictable weather that affects outdoor gardening, mushroom cultivation gives you remarkable control over your growing environment. The rapid harvest cycles mean quick feedback on your techniques, helping you improve with each grow.
Start with oyster mushrooms on coffee grounds—it’s nearly foolproof and gives you a taste of success that will fuel your enthusiasm for more adventurous varieties. Don’t be discouraged by early setbacks. Every expert cultivator has a graveyard of contaminated grows behind them. Each failure teaches you something valuable about the delicate balance mushrooms require.
The satisfaction of harvesting your first flush of homegrown mushrooms is unlike anything else in gardening. You’re not just growing food—you’re partnering with fungi in one of nature’s most ancient and mysterious processes. Welcome to the wonderful world of mycology. Your journey into growing mushrooms at home starts with a single spore, and it just might change how you think about food, sustainability, and the remarkable organisms we share this planet with.
Now get out there and grow some mushrooms!
References and Further Reading
- Cornell Small Farms Program: Mushroom Cultivation – Research-based growing information

